Mapview
So, Mapview or Mapview 2, which version should i use?
Mapview has been around for many years, it was started by Daishiva and has had a handful of other coders pick it up over the years to fix minor issues with it.
Mapview 2 is a updated version being worked on my Kevl from the OXC forums - See Link: that comes with a few (in my opinion ) improvements. Mapview 2 does away with the old File Format and uses a similar data structure to the OXC format making it easy for anyone who has started using YAML to pick it up. Also Kevl has been kind enough to build in a few extra features for me since i have returned to OXC ( after a few years being MIA) which make this the best option currently available.
The general advice i give as to which one to use comes down to this, if your a veterans modder, with hundreds of mapblocks already built into Mapview and dont want to re-create all the rulesets again in Mapview2, then stick to Mapview 1, if your a new modder or are happy on doing a little extra setup work, make the switch to Mapview 2.
All the notes shown below will be based upon Mapview 2, however i will keep the link to my Old Mapview notes here.
Mapview 2
Setup
.First, you will need to download the newest version of mapview from the website, please follow the link here.
Please install Mapview in your desired location ( i like to keep mine in my OXC folder).
Once installed, you will note 3 separate programs come as part of the install process, for this How-To, we just want to open Mapview.
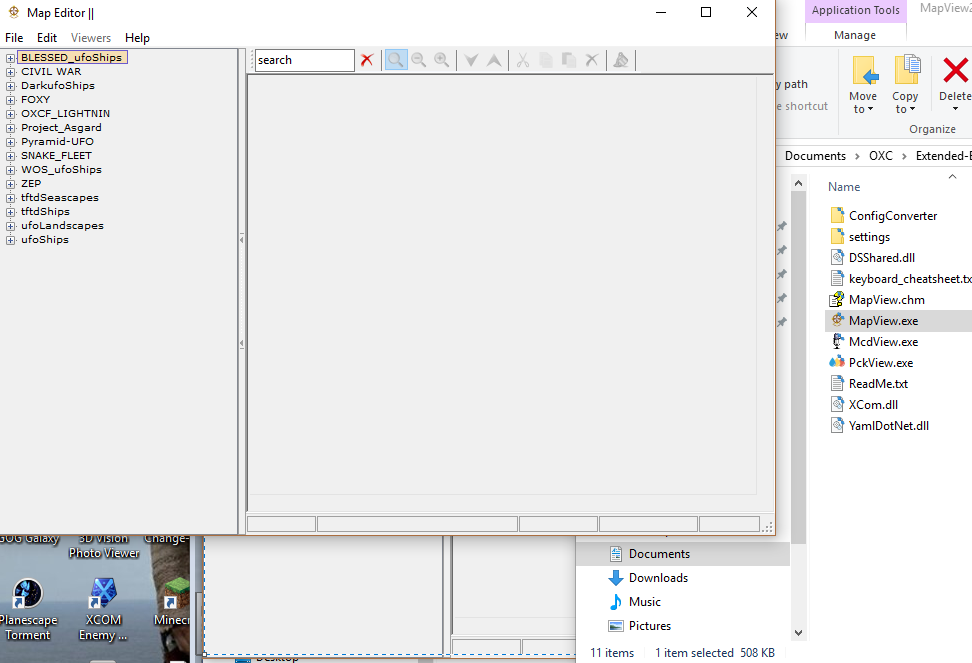
When it opens it will ask for the location of your UFO and/or TFTD files, it needs this so it can setup the default maps for you, follow the prompts and you will a job tree similar to mine one below shown ( Note: screenshot below has a few extra items in the tree, your version wont have these).
Using Mapview
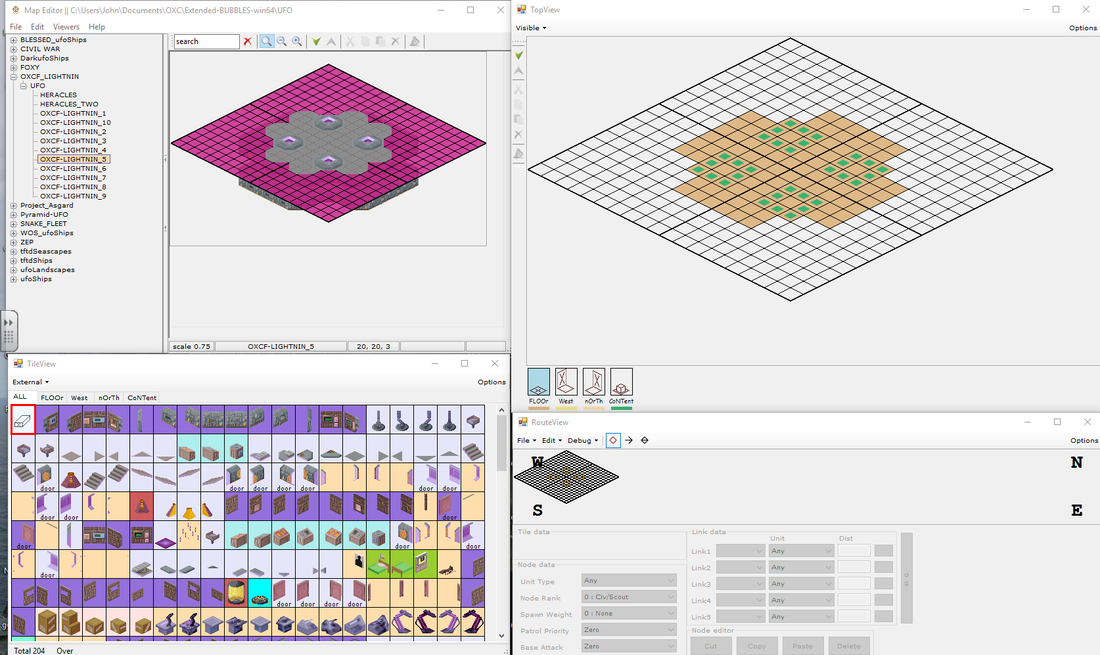
Now you have Mapview2 installed, if you selected one of the map sets it automatically created for you & then select one of the mapblock within that set, you should see an extra 3 windows open up on screen, if you cant see them ( or eventually close one by accident) you can turn these back on from the main window by using the drop down menu under "Viewers".
The General Window on Mapview has 4 sections
1: Main Window - Has the "Map List" tree and large graphic window to show what a map looks like
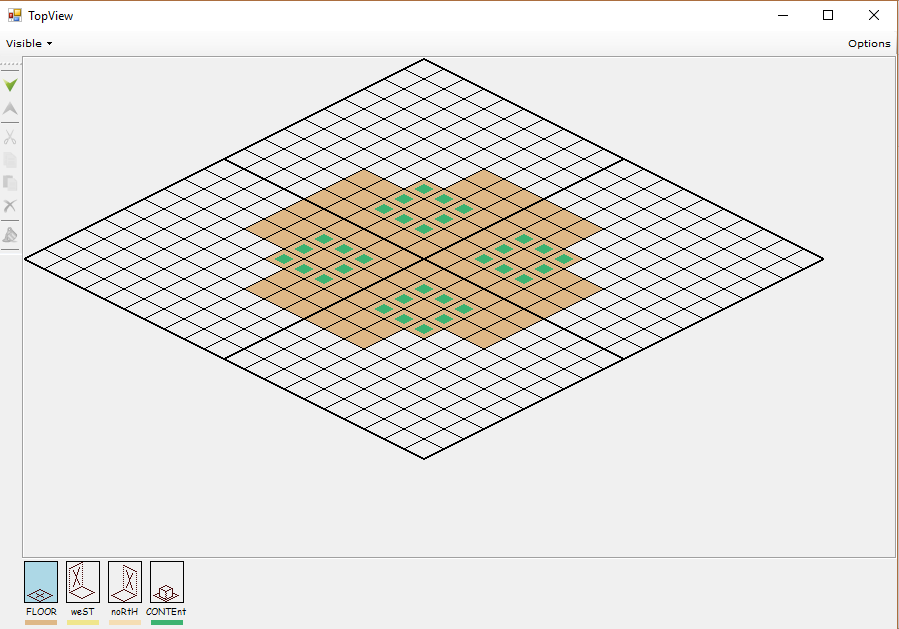
2: Top View - Is where you place the Tiles onto the Map block, there is 4 sections - make sure you place objects in correct one ( for example Don't place a table in the "Floor" slot.
3: TileView - shows what tiles are loaded for use within the selected map block
4: RmpView -Shows the Spawn points for the map you have currently selected
The Top View Window
|
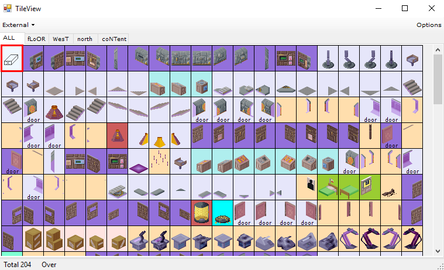
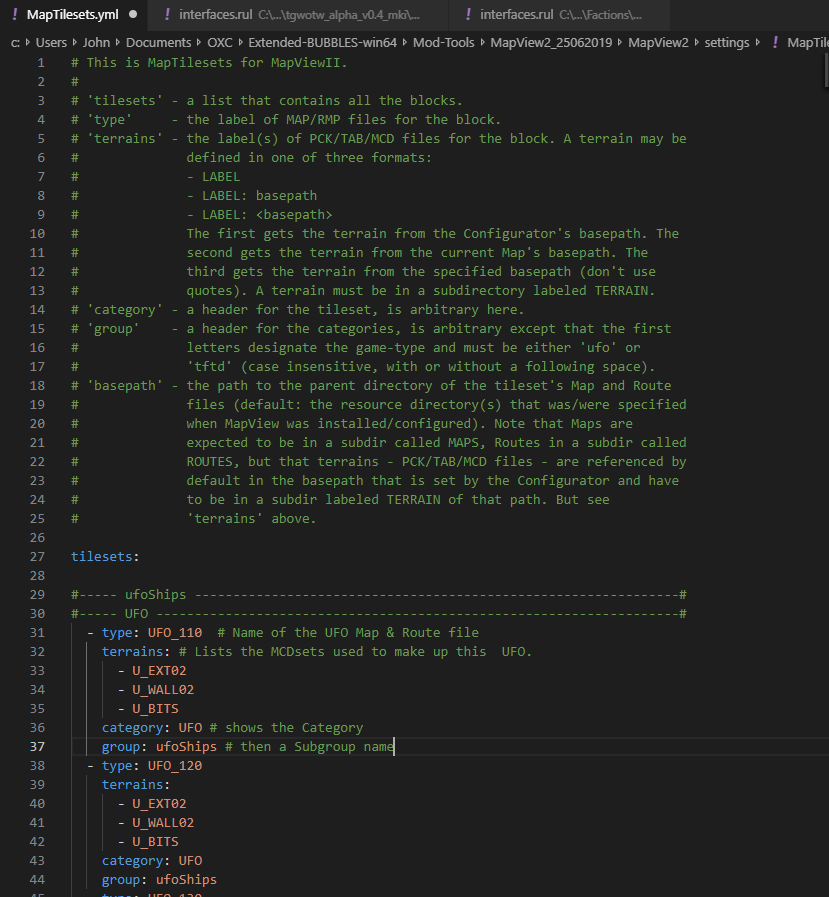
The tileview window shows all the tiles that are available within this set. You can add extra tile sets to any mapblock by editing the MapTilesets.yml file but we will cover this later on.
Point of Interest: * There are several groupings shown within the TileView Window - All, Floor,West,North,Content. Obviously ALL shows ALL, but the others are filter options that show which group each item belongs to and should be placed on the map, For example, placing a DOOR down on the map in the CONTENT section may visually look correct on the view window but in game the door will never open, so for the most part you need to keep each item in the correct location ( there are some exceptions to the rules but we will cover them later). |
*Another point of interest is the TOTAL number at the bottom of this window, this shows how many Tiles you currently have available to use on the mapblock, If this number exceeds 256 items, you will have data that can not be used in game ( there are ways to overcome this limit but we can cover them later on also).
*Double clicking any Tile will open a pop-up window showing the stats of each object, this is helpful if you already understand the MCDdata however if you are a new user, this info will make a lot more sense to you if you use another program to read this ( like PCKEDIT or PCKVIEW).
*The final point i wish to mention is in the External dropdown, here you can get Mapview2 to quickly open up some of the other common modding tools to allow you to correct any issues you find quickly when creatign a set, this is such a simple feature but it does come in handy when your making your own MCDSETS and you notice something is set wrong.
The TileView window
|
Is where you place the Tiles onto the Map block, there is 4 sections - make sure you place objects in correct one ( for example Don't place a table in the "Floor" slot).
Point of Interest: *Each Grid on the TileView map can have 4 PCK items placed inside, to add a tile the Grid first select an item from the Topview window, select which box it should be placed within, then right click on the desired location. * You can use the Copy and Paste function to grab entire sections a mapblock and place it in another location. * You will notice the Tileview has a thick black line every 10x10 grid spacing, this is to make it easier to correctly place the items during the copy and pasting process. * At the top of the screen there is a Visible dropdown box, this box allows you to Hide any of the layer options ( Floor, East, South, Content), this makes it easier to look for errors on your mapblock. |
The RmpView window
|
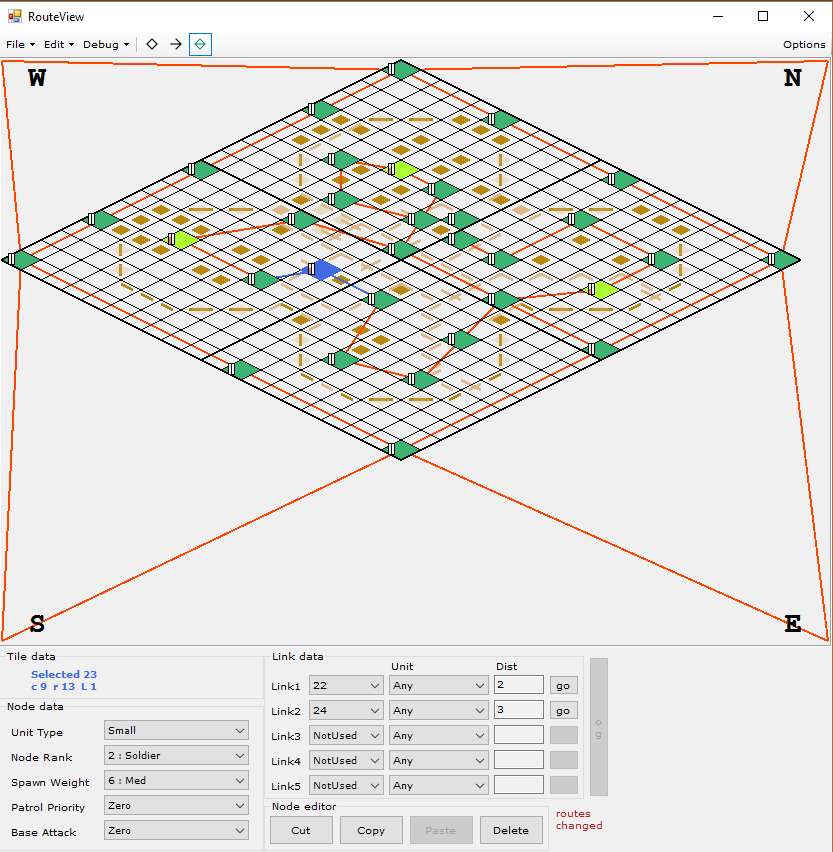
The RMPView window allow you to place and edit the Spawn and Patrol Nodes for each map block.
Point of Interest: * Aliens walk between Nodes when in Patrol Mode, as such if you want the aliens to move from Position A to B, you need to place the nodes on the map. *To the right of the Debug screen is 3 buttons, these change the linking type for the patrol nodes. If your happy to allow the aliens to be able to walk back and forth between the paths your about to place then turn 2 way nodes on, if you only want them to walk one way, keep it on 1 way node. As you add more Nodes, you will notice the Link Data is continuously updated. * Dont forget to add links to walk to different Mapblocks, you do this in the LinkData section by selecting which direction you want to Link the Mapblock to ( N.E.S.W). * For 2x2, the unit will always spawn in the NW corner, so if you want to avoid a unit spawning inside a wall, always ensure you have a enough clear map cells to spawn the unit and if you put them inside a room, make sure they have a wall big enough for them to get out. |
- unittype is used for spawning and patrolling only; it is not used by links
- noderank affects both spawning and patrolling, but note that noderank has a fallback mechanic for spawning such that if no node with an aLien's rank is found, a succession of (all) other ranks will be investigated (but not XCOM rank ofc)
- unittypes: small units are allowed to use large nodes but not vice versa and flying units are allowed to use non-flying nodes but not vice versa. Thus 'Large' nodes are effectively identical to 'Any' nodes.
- link distance is not used
- spawnweight 0 disallows spawning at a node, but patrolpriority 0 is valid for patrolling to a node if a unit is flagged, by OxC, to "scout" (details tbd) else patrolpriority 0 disallows patrolling the node: the OxC "scout" flag appears to be, at least in part, another fallback mechanic that is, an alien will check for valid non-scout nodes first but if none are found, the routine then checks for valid "scout" nodes. But don't quote me on that; there's more going on between (a) patrolpriority, (b) noderank, and (c) the "scout" flag ...
- it appears that if the OxC "scout" flag is not set, then the alien to which it's being applied will not leave the block it's currently in. More
- quote from the OxC code: "scouts roam all over while all others shuffle around to adjacent nodes at most"I believe, at a guess, that this is designed to keep Commanders in the command module, eg, or at least increase the chance of aLiens sticking around non-CivScout patrol nodes. Long story short: OxC has hardcoded patrolling behaviour beyond what can be determined by the Route files.
Changing Mapedit Data
Editing a Mapblock
Edit a Map Block
To add/remove Tiles to a map block , first select which map block you wish to change. Then select a item using a Left click on your mouse in the Tileview window . Now Switch back to the TopView window, there are four boxes on the bottom of this screen ( Floor, West ,North and Content) Select which location you will be adding the desired tile to, then Pick the location on the map grid you where you want to place it, then Right Clicking on your mouse will add it that location.
To delete a item from TopView window you can select the delete option from the Tileview window OR double right click on a item you wish to clear ( Make sure you select what content you are selecting again , its impossible to delete the floor tile if you still have content selected). Once your map is setup the way you desire you are ready to move onto Spawn Nodes
On the RmpView Window and Right click where you want your first node to be placed. It is important to note that these nodes are used to spawn Units and allow them to walk between map blocks. Once you have placed a few Nodes Link them together ( See Link1 -5 on the image) and to each edge of the battle map so Aliens can walk onto the map from all directions. At this point you can specify what units will use this node, can anyone walk along this path , maybe you just want flying units to use it, the choice is yours . NOTE: If you want an Alien to move from NODE A to NODE B , then you need to make sure the 2 Nodes are linked, Once the alien is at NODE B, If you want him to walk back to NODE A , you need a separate link on Node B back to Node A as otherwise you are only setting up a one way path.
|
Once i have set up my nodes around my map i usually change a desired amount to spawn points and WHO can spawn at these points.
Unit Type - What kind of unit will use this node . The options are Any, Flying ,Flying Large, Large or small units ( According to Daiky there is no Flying Large- its a error in mapview) Node Type - Who will spawn here , Xcom agents, Civilians ,Alien Leader or soldier ? Spawn Weight - Do you wish a unit to spawn here ( You will note there are several options here, just dont ask me why , i always pick 1) Patrol Priority - Increases the likelihood that the aliens will patrol this Node. Base Attack - To be confirmed....Gets the aliens to attack a particular map block. |
